Are you ready for a dessert that will blow your mind? Imagine creamy cheesecake layered with sweet apples and topped with a crunchy crisp. This recipe for Apple Crisp Cheesecake Bars is simple and perfect for any occasion. You’ll impress your friends and family with these tasty treats. Let’s get started on creating this irresistible dessert that combines the best of both worlds!
Why I Love This Recipe
- Delicious Flavor Combination: The blend of creamy cheesecake, sweet apples, and a crunchy topping creates a delightful dessert experience that satisfies all taste buds.
- Easy to Make: With simple ingredients and straightforward steps, these bars are perfect for both novice and seasoned bakers looking for a tasty treat.
- Perfect for Any Occasion: Whether it’s a holiday gathering or a casual weeknight dessert, these cheesecake bars are sure to impress family and friends.
- Can Be Made in Advance: These bars can be prepared ahead of time and stored in the fridge, making them a convenient option for busy schedules.
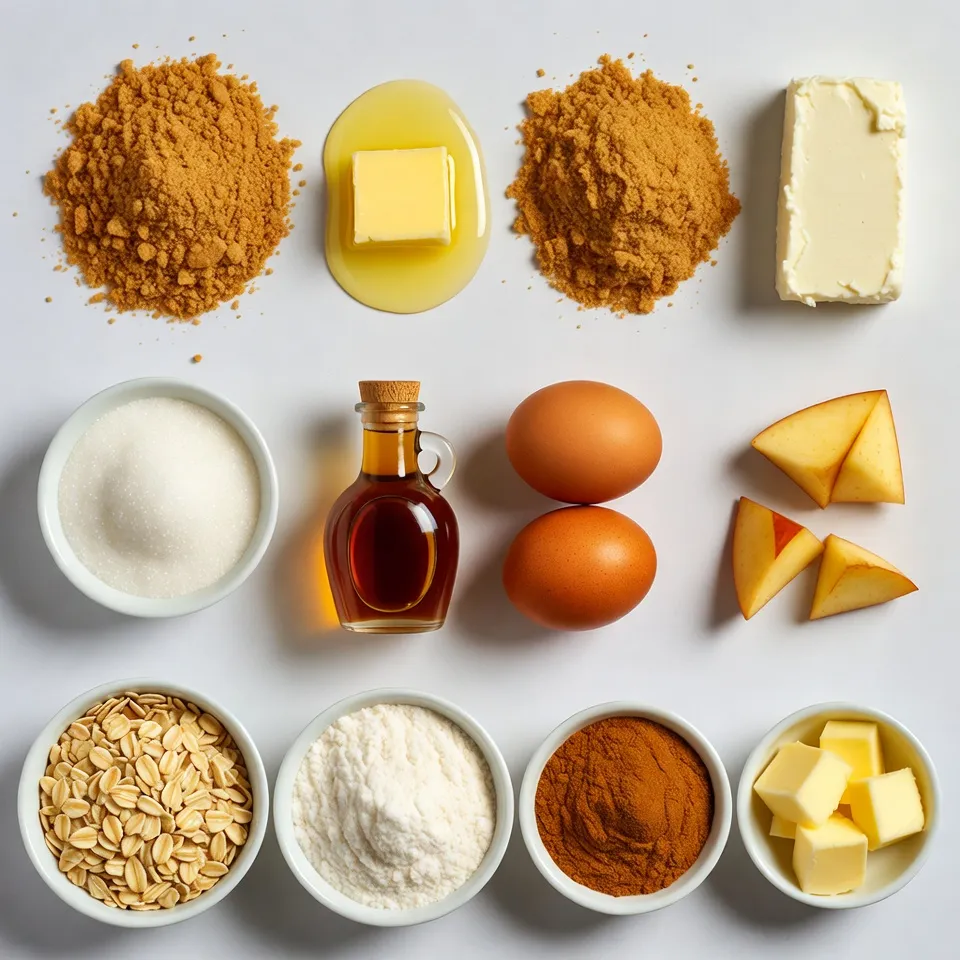
Ingredients
For the Crust
– 1 ½ cups graham cracker crumbs
– ½ cup unsalted butter, melted
– ¼ cup brown sugar
For the Cheesecake Layer
– 16 oz cream cheese, softened
– ¾ cup granulated sugar
– 1 teaspoon vanilla extract
– 2 large eggs
– 2 cups fresh apples, peeled, cored, and diced (about 2 medium apples)
For the Apple Crisp Topping
– 1 cup old-fashioned oats
– ¾ cup all-purpose flour
– ½ cup brown sugar
– ½ teaspoon cinnamon
– ½ cup cold unsalted butter, diced
These ingredients make a delightfully sweet and creamy dessert. The crust is crunchy and rich, while the cheesecake layer is smooth and fruity. The apple crisp topping adds a nice crunch and warm flavor. You will want to gather everything before you start. By doing this, you can move quickly through each step. Each layer works together to create a lovely treat. The apples bring a fresh taste, and the spices in the topping warm up each bite.
Step-by-Step Instructions
Prepare the Crust
– Preheat the oven to 325°F (160°C).
– In a medium bowl, mix graham cracker crumbs, melted butter, and brown sugar. This mixture should feel moist and crumbly.
– Press the mixture firmly into the bottom of a greased 9×9-inch baking dish. Make sure it is even.
Make the Cheesecake Layer
– In a large mixing bowl, beat softened cream cheese until smooth. This step is key for a creamy texture.
– Gradually add granulated sugar and vanilla extract, mixing well.
– Add two large eggs one at a time, blending until just combined.
– Fold in diced apples gently. This adds a nice texture and flavor.
Assemble the Bars
– Pour the cheesecake mixture over the prepared crust evenly. Spread it out with a spatula.
Prepare the Apple Crisp Topping
– In another bowl, combine oats, flour, brown sugar, and cinnamon. This mix gives a sweet crunch.
– Add diced cold butter. Mix using your fingers or a pastry cutter until it looks like coarse crumbs.
– Sprinkle the topping evenly over the cheesecake layer. This creates a delicious topping.
Bake
– Place the baking dish in the preheated oven. Bake for 40-45 minutes. The top should turn golden brown, and edges will puff up.
– Let it cool at room temperature. After that, refrigerate for at least 2 hours. This helps set the bars.
Serve
– Cut into squares. You can serve them chilled or at room temperature. For a special touch, drizzle with caramel sauce before serving.
Tips & Tricks
Achieving the Perfect Cheesecake Texture
– Use room temperature cream cheese for a creamy consistency. Cold cream cheese can lead to lumps. So, let it sit out for about 30 minutes before mixing.
– Avoid over-mixing the cheesecake layer to prevent cracks. Mix just until the ingredients are combined. This keeps the cheesecake smooth and even.
Enhancing Flavor
– Add more spices like nutmeg for a warm flavor. A pinch can elevate the taste of your bars. You can also try cinnamon or ginger for extra warmth.
– Consider incorporating caramel sauce in the cheesecake mix for added sweetness. It blends well with the apples and makes each bite even more delightful.
Presentation Ideas
– Garnish with thin apple slices and whipped cream. This adds color and makes your bars look fancy.
– Dust with powdered sugar for a touch of elegance. It gives a nice contrast to the rich bars and makes them feel special.
Pro Tips
- Use Fresh Apples: For the best flavor and texture, opt for crisp, fresh apples such as Granny Smith or Honeycrisp. Their tartness balances the sweetness of the cheesecake nicely.
- Room Temperature Ingredients: Ensure your cream cheese and eggs are at room temperature before mixing. This helps achieve a smooth and creamy cheesecake layer without lumps.
- Don’t Overbake: Keep an eye on the baking time. The cheesecake should be set but still slightly jiggly in the center when you take it out of the oven. It will firm up as it cools.
- Chill Before Serving: Allow the cheesecake bars to chill in the refrigerator for at least 2 hours before slicing. This helps the bars hold their shape and enhances the flavors.
Variations
Gluten-Free Version
If you want a gluten-free treat, you can easily make some swaps. Use gluten-free graham cracker crumbs instead of regular ones. This keeps the crust tasty and safe for those avoiding gluten. For the topping, switch all-purpose flour with almond flour. This change gives a nice nutty flavor, adding richness to your apple crisp cheesecake bars.
Different Fruit Options
Want to change up the flavors? You can swap out apples for pears or peaches. Both fruits work well and add their unique taste. Mixed berries are another fun option. They create a colorful and vibrant dessert. The sweet and tart berries will bring a new twist to your bars.
Vegan Adaptation
For a vegan-friendly version, you can use vegan cream cheese. It gives the same creamy texture without dairy. Instead of eggs, try using flaxseed meal mixed with water. This mix binds well and keeps your bars moist. Replace butter with coconut oil or another plant-based fat. This keeps the rich taste while sticking to a vegan diet.
Storage Info
Refrigeration Instructions
Store any leftovers in an airtight container in the fridge. This keeps them fresh and tasty. They last for up to 5 days. After that, they might not taste as good.
Freezing Instructions
You can freeze these bars if you have extras. Wrap each bar tightly in plastic wrap. Store them in a freezer bag or container. They will stay good for up to 3 months. When you are ready to eat them, just thaw in the fridge overnight.
Reheating Tips
If you want to warm them up, use a microwave. Heat them for a few seconds. You can also enjoy them cold right from the fridge. Either way, they taste great!
FAQs
Can I use pre-made crusts for this recipe?
Yes, a store-bought graham cracker crust can be used. This saves time and still tastes great. If you’re busy, this shortcut works well. Just make sure to follow the rest of the steps as is. The flavors will still shine through.
How can I tell if the cheesecake bars are done baking?
Look for a golden top and slightly puffed edges; they should not jiggle in the center. This means they are set and ready to cool. Overbaking can dry them out, so watch closely. When they are done, let them cool to set the perfect texture.
Can I use other cheeses for the cheesecake layer?
Cream cheese is recommended, but mascarpone could provide a unique flavor. Mascarpone adds a rich creaminess. You can mix it with cream cheese for a twist. Both options taste amazing and give a creamy layer that pairs well with apples.
How many servings does this recipe yield?
This recipe yields about 12 bars. Perfect for sharing at parties or family gatherings. You can cut them into smaller pieces for a fun bite-sized treat. Everyone will want to try this delicious dessert!
You learned how to make delicious apple cheesecake bars with an easy recipe. We covered each step, from preparing the crust to crafting the perfect apple crisp topping. You have tips for flavor and texture, plus variations for gluten-free and vegan diets.
Now, you can enjoy these bars at home, sharing them with friends and family. This treat is sure to impress, whether for a gathering or a simple dessert. Happy bakin