Who doesn’t love creamy, dreamy ice cream? If you’re craving a treat that’s easy to make, I’ve got just the recipe for you: No-Churn Cookies and Cream Ice Cream! You won’t need any fancy machines or hard techniques. Just a few simple ingredients and steps will get you there. I’ll guide you through this sweet journey so you can whip up a delicious scoop of joy in no time!
Why I Love This Recipe
- Easy to Make: This recipe requires minimal ingredients and simple steps, making it perfect for beginners.
- Decadent Flavor: The combination of creamy ice cream and crunchy cookies creates a delightful treat that everyone loves.
- Customizable: Feel free to mix in your favorite candies or use different cookie flavors for a unique twist.
- Perfect for Any Occasion: This ice cream is great for parties, picnics, or just a cozy night in.
Ingredients
List of Essential Ingredients
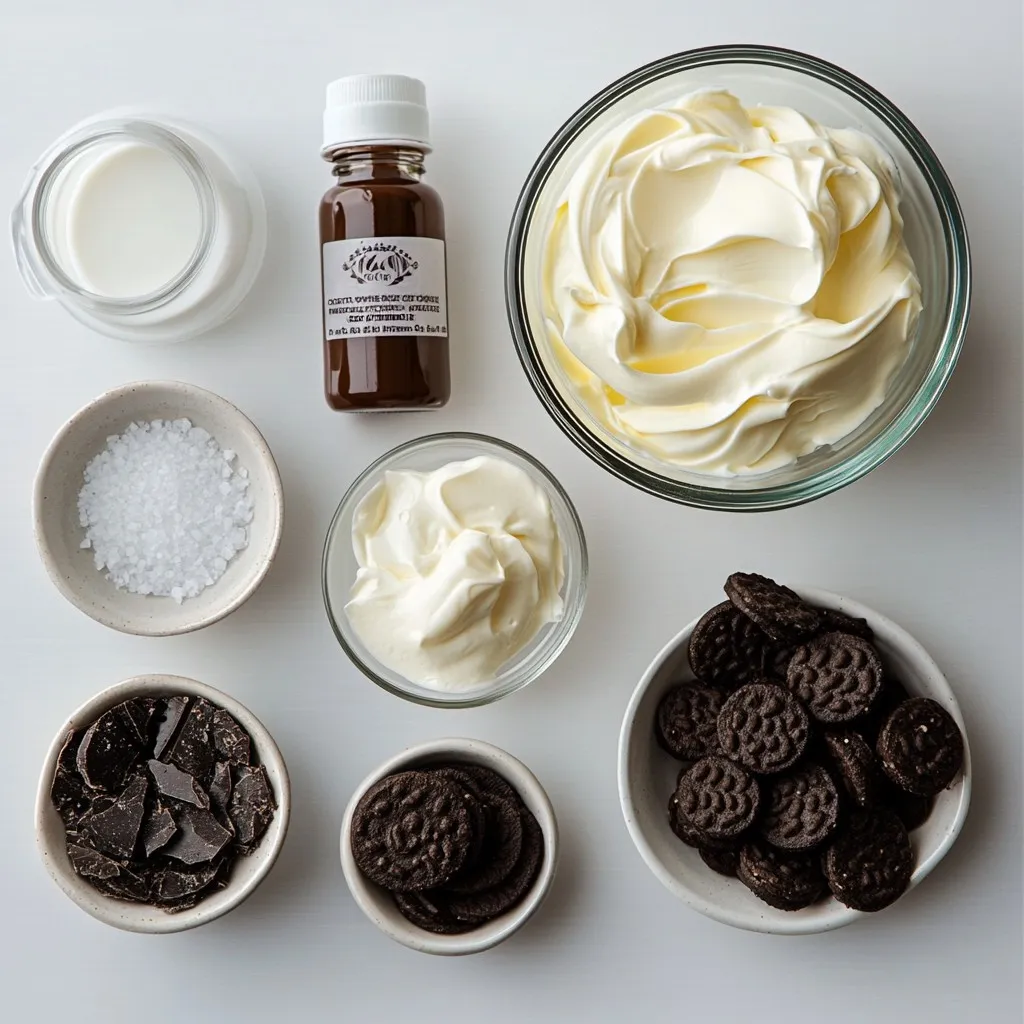
To make No-Churn Cookies and Cream Ice Cream, gather these key ingredients:
– 2 cups heavy whipping cream
– 1 cup sweetened condensed milk
– 2 teaspoons vanilla extract
– 1 ½ cups chocolate sandwich cookies (like Oreos), crushed
– Pinch of salt
These ingredients work together to create a rich and creamy ice cream base. The heavy cream gives it a smooth texture, while sweetened condensed milk adds sweetness.
Optional Add-ins for Extra Flavor
You can enhance your ice cream with a few fun add-ins:
– Crushed nuts for crunch
– Mini chocolate chips for extra chocolate
– Swirls of chocolate or caramel sauce
These additions can make your ice cream even more special. They can add texture and new flavors that surprise your taste buds.
Tips for Choosing the Best Cookies
When picking cookies, choose ones that crush easily. Look for:
– Fresh chocolate sandwich cookies for the best flavor
– Store brands can also work well
– Avoid cookies that are too soft or stale
Fresh cookies give your ice cream the best taste and texture. A good cookie adds a nice crunch and chocolatey goodness.
Step-by-Step Instructions
Detailed Instructions for Mixing Ingredients
Start by gathering your ingredients. You need heavy whipping cream, sweetened condensed milk, vanilla extract, chocolate sandwich cookies, and a pinch of salt.
In a large bowl, beat the heavy whipping cream. Use an electric mixer on medium-high speed. Mix for about 3-5 minutes. You want stiff peaks to form. This step gives your ice cream that light and airy texture.
In another bowl, whisk the sweetened condensed milk, vanilla extract, and salt. Mix until smooth. This creamy base will blend well with the whipped cream.
Techniques for Folding and Maintaining Fluffiness
Now it’s time to combine the two bowls. Gently fold the whipped cream into the condensed milk mixture. Use a spatula for this task. Be careful not to deflate the whipped cream.
Lift and turn the mixture. This technique helps keep the air in the whipped cream. The fluffiness is key for a light ice cream. Avoid stirring too hard or too fast.
How to Properly Freeze for Best Results
Once mixed, add the crushed chocolate sandwich cookies. Fold them in gently. Make sure they are evenly distributed.
Next, transfer the mixture to a freezer-safe container or a loaf pan. Smooth the top with your spatula. Cover the container with a lid or plastic wrap.
Freeze for at least 6 hours. This wait makes the ice cream firm and ready to scoop. Enjoy your homemade treat!
Tips & Tricks
How to Achieve the Best Texture
To get a creamy texture, whip the heavy cream until it forms stiff peaks. This takes about 3-5 minutes. Don’t rush this step. If the cream is over-whipped, it can become grainy. When you fold the whipped cream into the condensed milk, be gentle. Use a spatula and fold slowly. This helps keep the ice cream light and fluffy.
Serving Suggestions and Presentation Ideas
For a fun serving idea, scoop the ice cream into cones. Top each cone with more crushed cookies. This adds a nice crunch. You can also serve the ice cream in bowls. Drizzle chocolate syrup over the top for extra sweetness. Add a dollop of whipped cream and a cherry for a classic touch.
Troubleshooting Common Issues
If your ice cream is too icy, it may freeze too long. Keep an eye on the freezing time. If it seems too soft, it might need more time in the freezer. If your mixture is not smooth, make sure to blend the sweetened condensed milk well. This helps combine the flavors and keeps the texture creamy.
Pro Tips
- Use Cold Ingredients: Make sure your heavy whipping cream and mixing bowl are well-chilled before whipping. This helps achieve better volume and stability in your whipped cream.
- Choose the Right Cookies: While Oreos are classic, feel free to experiment with different chocolate sandwich cookies for unique flavors and textures.
- Don’t Overmix: When folding the whipped cream into the condensed milk mixture, do so gently. Overmixing can deflate the whipped cream, resulting in a denser texture.
- Freeze Overnight: For the best texture, consider freezing the ice cream overnight. This allows it to firm up properly and develop a richer flavor.
Variations
Different Cookie Options (Gluten-Free, Chocolate Chip, etc.)
You can change the cookies in this ice cream to fit your taste. If you want a gluten-free treat, choose gluten-free sandwich cookies. These cookies taste great and work well in the recipe. You can also use classic chocolate chip cookies. They add a nice twist to the ice cream. Just make sure to crush them well so they mix in nicely.
Dairy-Free Alterations
To make a dairy-free version, swap out the heavy cream and condensed milk. Use coconut cream instead of heavy cream for a rich taste. You can find sweetened condensed coconut milk in stores. This will keep the recipe creamy without dairy. It’s a fun way to enjoy this treat if you can’t have dairy.
Flavor Additions (Mint, Peanut Butter, etc.)
You can add fun flavors to your ice cream! If you love mint, add a few drops of mint extract. This gives your ice cream a fresh twist. For peanut butter lovers, fold in a half cup of creamy peanut butter. Mix it well for a nice, nutty flavor. You can also try adding mini chocolate chips or sprinkles for a fun crunch. The best part is you can get creative and make it your own!
Storage Info
How to Store Leftover Ice Cream
To store leftover ice cream, use an airtight container. This keeps ice cream fresh. If you don’t have one, wrap a loaf pan tightly with plastic wrap. Make sure the wrap is smooth against the ice cream surface. This helps prevent ice crystals from forming.
Best Practices for Freezing
Always freeze the ice cream as soon as you make it. Place it in the coldest part of your freezer. Avoid opening the freezer often. Each time you open it, warm air enters, which can ruin the texture. To serve, let it sit out for a few minutes before scooping. This softens it just enough for easy serving.
Shelf Life Expectations
Your no-churn cookies and cream ice cream can last about two weeks in the freezer. After that, it may start to lose flavor and texture. Always check for any freezer burn before serving. If you see ice crystals, it is best to toss it. Enjoy it while it’s fresh for the best taste!
FAQs
Can I make this ice cream without whipping cream?
No, you need whipping cream for this recipe. It gives the ice cream its light and fluffy texture. Without it, the ice cream won’t have the same creamy feel. If you want a lighter option, you can try using whipped coconut cream. However, it may change the taste a bit.
How long can I keep No-Churn Cookies and Cream Ice Cream in the freezer?
You can keep this ice cream in the freezer for about two weeks. After that, it may start to lose its texture and taste. To keep it fresh, make sure you cover it tightly. Use a lid or plastic wrap to avoid freezer burn.
Can I add toppings before freezing?
Yes, you can add toppings before freezing! This can be fun and tasty. Just mix in small pieces of chocolate, nuts, or more crushed cookies. Be careful not to add too much, or it may affect the texture. Keep in mind that some toppings may freeze hard, so add them just before serving for the best crunch.
This blog post covered essential ingredients, step-by-step mixing, and tips for great cookies. We explored variations and how to store leftovers. Each section aims to guide you in baking your perfect treat. Remember, experimenting with flavors can lead to fun new discoveries. Keep these tips handy and enjoy baking cookies that impress. Trust your skills as you create delightful, sweet memories in your kitche