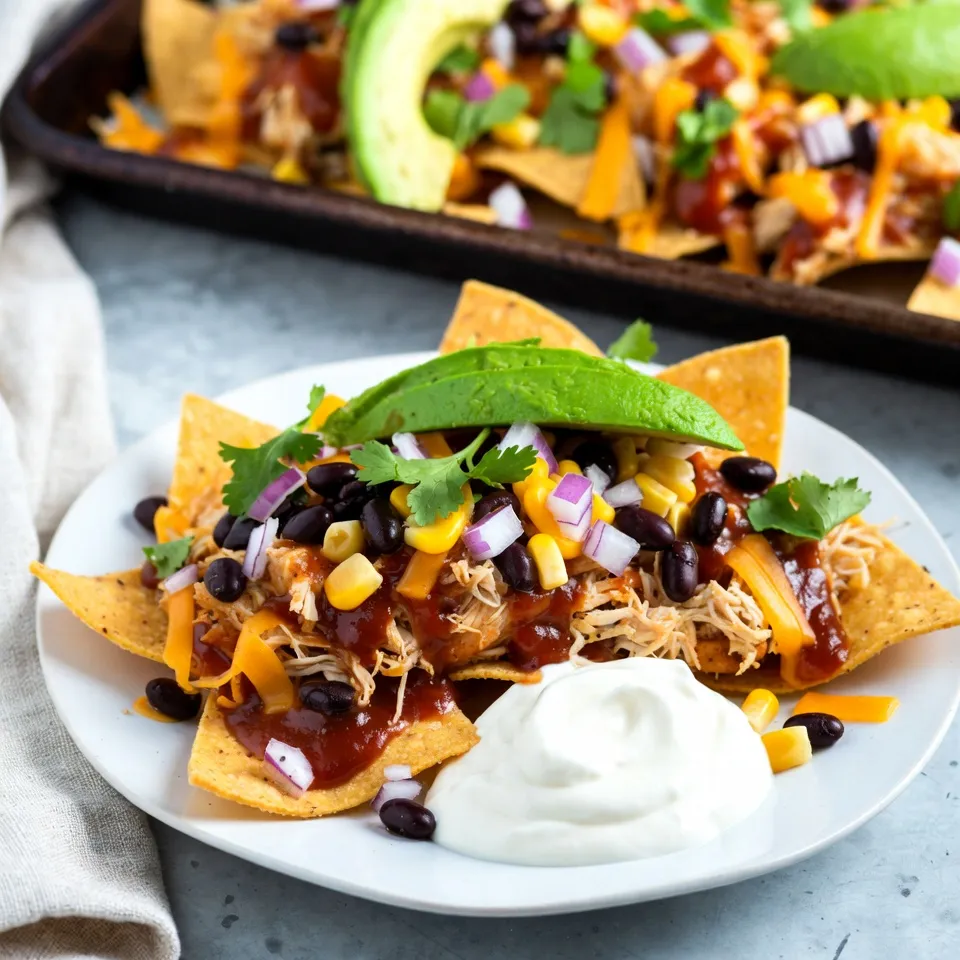
Looking for a tasty, easy snack? Try my savory Sheet Pan BBQ Chicken Nachos! This dish is perfect for game day, parties, or just a night in. With juicy chicken, smoky BBQ sauce, and melted cheese all on crispy tortilla chips, every bite is a crowd-pleaser. Plus, customizing with your favorite toppings is a breeze! Let’s dive into how you can make this delicious dish in no time.
Why I Love This Recipe
- Quick and Easy: This dish comes together in just 30 minutes, making it perfect for busy weeknights or last-minute gatherings.
- Flavor Packed: The combination of BBQ chicken, cheese, and fresh toppings creates a delicious flavor explosion in every bite.
- Customizable: You can easily adjust the toppings to suit your taste—add more veggies, switch up the cheese, or spice it up with extra jalapeños!
- Perfect for Sharing: This sheet pan nacho recipe is great for sharing at parties or game day, bringing everyone together around a tasty treat.
Ingredients
Main Ingredients
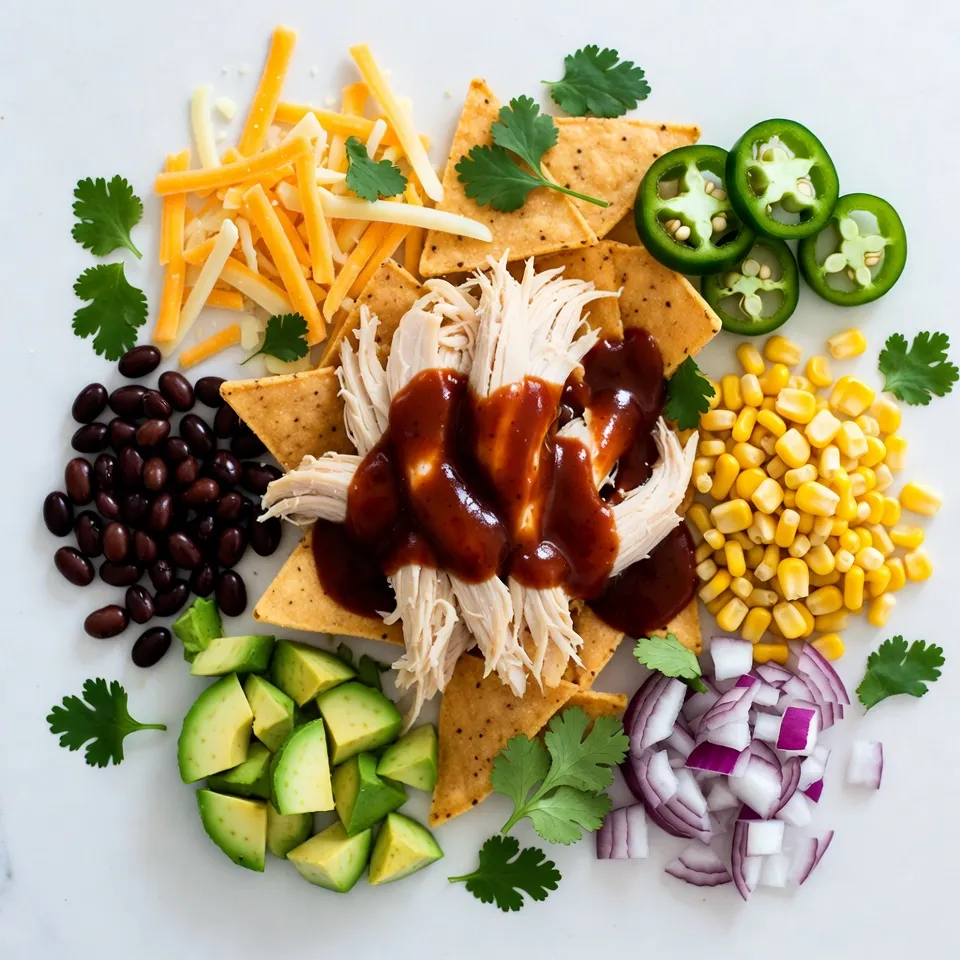
– 2 boneless, skinless chicken breasts, cooked and shredded
– 1 cup BBQ sauce (your choice)
– 1 bag (12 oz) tortilla chips
– 2 cups shredded cheddar cheese
Optional Add-ins
– Jalapeño slices
– Diced red onion
– Fresh cilantro
– Sour cream
Equipment Needed
– Baking sheet
– Mixing bowl
– Oven
Gathering your ingredients is the first step to making these delicious nachos. Start with the chicken breasts, which you should cook and shred. Mixing the shredded chicken with your favorite BBQ sauce adds a sweet and smoky flavor that pairs beautifully with the other ingredients.
Next, grab a bag of tortilla chips. These will serve as the crispy base for your nachos. I recommend using a sturdy chip to hold all the toppings without getting soggy.
Cheddar cheese is key. It melts well and adds a rich taste. You can use pre-shredded cheese for ease, or shred fresh cheese for a creamier texture.
Optional add-ins give you room to play. Jalapeño slices add heat if you like spice. Diced red onion adds crunch and a bit of bite. Fresh cilantro brightens the dish and provides a fresh contrast. Don’t forget sour cream! It cools down the heat and adds creaminess.
For equipment, a baking sheet is a must. It holds all your goodies and lets them bake evenly. A mixing bowl is needed for combining the chicken and BBQ sauce. Finally, your oven will be crucial for melting the cheese and warming everything through.
With these ingredients and tools ready, you’ll be well on your way to creating a fun and tasty snack!
Step-by-Step Instructions
Preparing the Chicken
– First, take the cooked chicken breasts and shred them into small pieces.
– Next, mix the shredded chicken with your favorite BBQ sauce in a bowl. Make sure every piece is coated well. This adds great flavor to the nachos.
Assembling the Nachos
– Now, grab a large baking sheet. Spread the tortilla chips evenly across the sheet.
– Scatter the BBQ chicken mixture over the chips. Make sure to cover them well.
– Layer in the black beans, corn, and diced red onion. Add these toppings evenly for the best taste.
– Finally, sprinkle the shredded cheddar cheese generously on top. This cheese will melt beautifully.
Baking the Nachos
– Preheat your oven to 400°F (200°C). This step is key for the perfect bake.
– Place the baking sheet in the oven and bake the nachos for 15-20 minutes. Keep an eye on them. You want the cheese to be melted and bubbly.
– Once done, take them out and let them cool for a couple of minutes. This helps avoid burnt tongues!
– Top with diced avocado and fresh cilantro. Serve right away with a side of sour cream!
Tips & Tricks
Getting the Perfect Cheese Melt
– Cheese Types: Use sharp cheddar for rich flavor. You can mix in Monterey Jack for a smooth melt. Avoid low-fat cheese as it may not melt well.
– Avoiding Soggy Chips: Layer your chips and toppings carefully. Start with chips on the bottom. Spread chicken and beans evenly, then add cheese last. Bake just until the cheese melts.
Ingredient Substitutions
– BBQ Sauce Alternatives: Feel free to use honey BBQ or spicy chipotle sauce. These give unique flavors and can change the dish’s vibe.
– Vegetarian Options: Swap chicken for seasoned tofu or tempeh. You can also add more beans for protein.
Serving Suggestions
– Best Accompaniments: Serve with sour cream or guacamole. Fresh salsa adds a nice touch too.
– Presentation Tips: Use a large platter for serving. Top with cilantro and diced avocado for color. Serve warm for the best taste.
Pro Tips
- Use Rotisserie Chicken: For even quicker preparation, use store-bought rotisserie chicken instead of cooking your own. Just shred it and mix with BBQ sauce.
- Layer Your Ingredients: To prevent sogginess, layer your ingredients strategically, placing cheese on top to help seal the chips from moisture.
- Customize Your Toppings: Feel free to add other toppings like sliced olives, diced tomatoes, or pickled jalapeños for extra flavor and texture.
- Watch the Oven: Keep a close eye on the nachos while baking; you want the cheese melted and bubbly but not burnt!
Variations
Southwestern Style
You can make these nachos even more exciting! Try adding some fresh ingredients.
– Ingredients: Add diced red bell peppers, black olives, or fresh corn salsa.
– Flavor Enhancements: A squeeze of lime juice gives it a zesty kick. Fresh cilantro adds a nice herbal note.
Tex-Mex Twist
Give your nachos a Tex-Mex flair with some simple changes.
– Include Different Cheeses: Use pepper jack or queso fresco for a creamy texture.
– Spice Level Adjustments: Add diced green chilies or more jalapeños for heat.
Vegan-Friendly Version
Want a plant-based option? It’s easy to swap ingredients.
– Ingredient Swaps: Replace chicken with shredded jackfruit or lentils.
– Plant-Based Options: Use vegan cheese and sour cream for a creamy finish.
These variations let you explore flavors while keeping the fun of nachos alive!
Storage Info
Storing Leftovers
To keep your nachos fresh, use an airtight container. This helps prevent sogginess. Store the nachos in the fridge. They taste best when eaten within three days. If you leave them out, they can spoil quickly.
Reheating Instructions
You have two choices for reheating: the oven or the microwave. The oven keeps the chips crispy. Preheat it to 350°F (175°C) and bake for about 10 minutes. The microwave is faster but may make the chips soft. If you use the microwave, heat in short bursts for about 30 seconds at a time.
Meal Prep Suggestions
To save time, prep some parts in advance. You can cook and shred the chicken ahead. Mix it with BBQ sauce, and store it in the fridge. Keep your chips and toppings separate until you are ready to eat. This way, you can assemble the nachos quickly. Just layer the chips, chicken, and toppings before baking!
FAQs
How can I make Sheet Pan BBQ Chicken Nachos spicier?
To add heat, you can mix spices into the BBQ sauce. Try cayenne pepper or chili powder. You can also add sliced jalapeños on top of the nachos before baking. If you want more kick, drizzle your favorite hot sauce over the finished dish. Sriracha or a spicy BBQ sauce works great too.
Can I use other proteins instead of chicken?
Yes, you can use different proteins. Ground beef, pulled pork, or shredded turkey all work well. If you want a vegetarian option, consider black beans or tofu. To cook, simply season your protein and prepare it as you would the chicken. Mix it with BBQ sauce, then layer it on the chips.
Are there gluten-free options for this recipe?
Absolutely! Look for gluten-free tortilla chips at the store. There are many brands to choose from. For BBQ sauce, check the label. Some sauces contain gluten. Try making your own with simple ingredients like ketchup and vinegar. This way, you can enjoy your nachos worry-free.
In this article, we explored how to make delicious Sheet Pan BBQ Chicken Nachos. We covered ingredients, from chicken breasts to tasty toppings. I shared step-by-step instructions for preparation and baking. You learned tips for achieving the perfect cheese melt and ways to customize your nachos. Lastly, we discussed storage and reheating strategies.
Enjoy trying different variations to suit your taste. Get creative and have fun with this dis