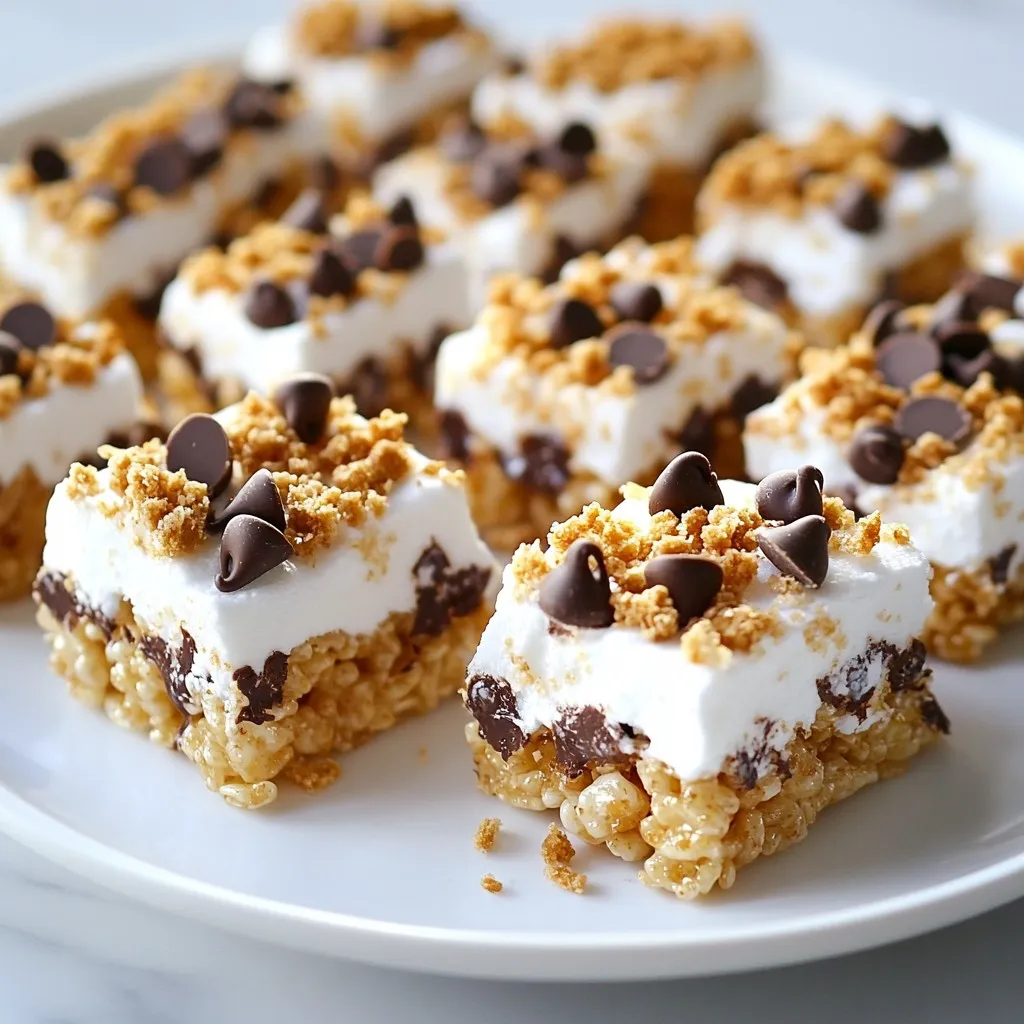
Ready to indulge in a sweet twist on a classic favorite? My S’mores Rice Krispie Treats bring all the fun of campfire s’mores without the fire! This delightfully simple recipe combines gooey marshmallows, crunchy Rice Krispies, and rich chocolate. Whether you’re a baking pro or a beginner, you’ll love how easy it is to create this tasty treat. Let’s dive into the yummy details!
Why I Love This Recipe
- Quick and Easy: This recipe takes just 15 minutes of prep time, making it perfect for a last-minute treat.
- Customizable: You can easily swap out chocolate types or add nuts for a personal twist.
- Kid-Friendly: Kids love getting involved in making these fun, gooey treats that are perfect for any occasion.
- Perfect for Sharing: Cut into squares, these treats are great for parties, picnics, or just a sweet snack to enjoy with friends.
Ingredients
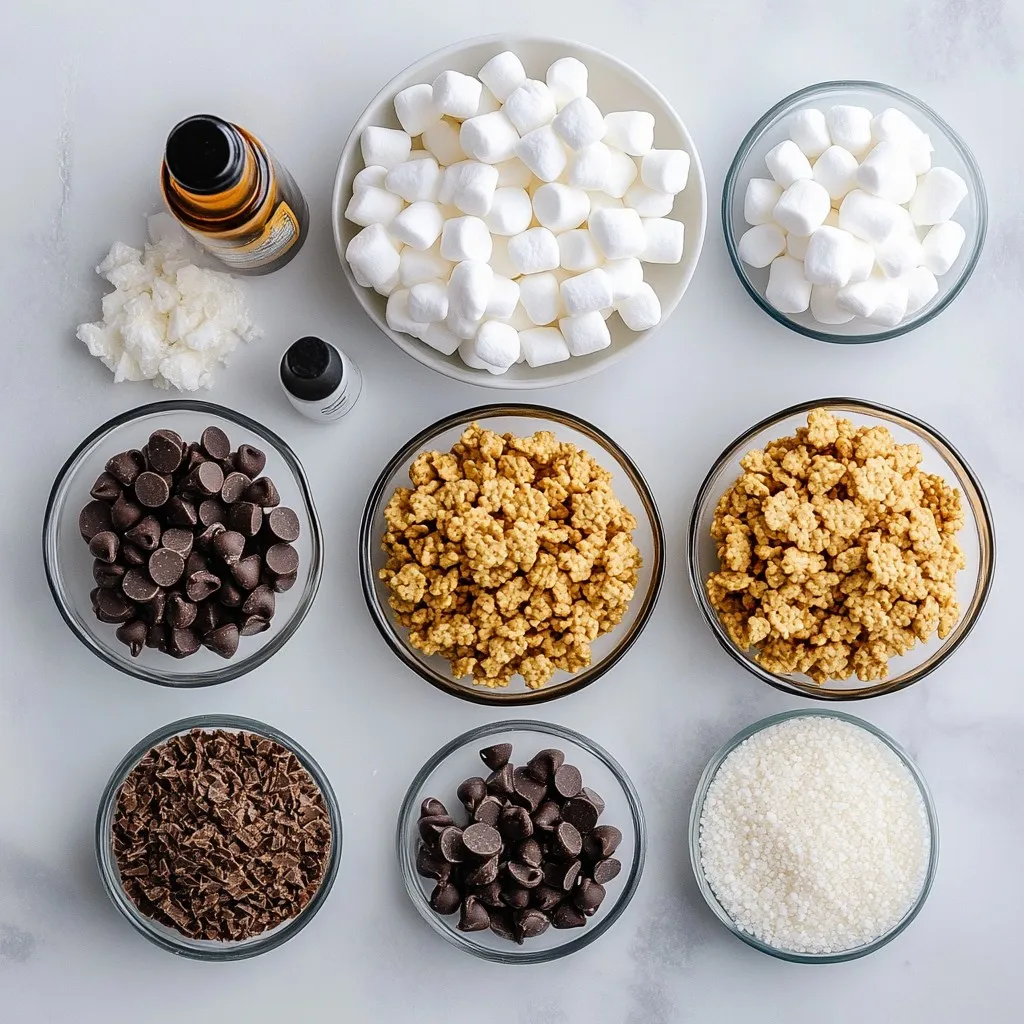
Complete list of ingredients
To make S’mores Rice Krispie Treats, gather these key ingredients:
– 4 cups Rice Krispies cereal
– 4 cups mini marshmallows
– 3 tablespoons unsalted butter
– 1 cup graham cracker crumbs
– 1 cup chocolate chips (milk or dark)
– 1 teaspoon vanilla extract
– A pinch of salt
– Extra chocolate chips and graham cracker crumbs for topping
These ingredients create the classic flavors of s’mores in a fun treat.
Optional toppings and add-ins
You can customize your treats with these fun options:
– Toasted coconut for a tropical twist
– Peanut butter chips for added richness
– Chopped nuts for crunch and flavor
– Different types of chocolate, like white or caramel
These toppings let you get creative and make each batch unique.
Ingredient substitutions
If you need to swap some ingredients, here are my suggestions:
– Use gluten-free Rice Krispies for a gluten-free version.
– Swap mini marshmallows with large ones. Just cut them down for even melting.
– Substitute butter with coconut oil for a dairy-free option.
– Use Nutella or a nut butter instead of chocolate chips for a different taste.
These substitutions keep the spirit of s’mores alive while catering to dietary needs.
Step-by-Step Instructions
Preparation of the pan
Start by greasing a 9×13-inch baking dish. You can use cooking spray or butter. This step helps keep the treats from sticking. Make sure to cover all corners well. A well-prepared pan makes it easy to lift out the treats later.
Melting the butter and marshmallows
Next, grab a large saucepan. Place it on low heat. Add the three tablespoons of unsalted butter. Stir the butter slowly until it melts. Once melted, toss in four cups of mini marshmallows. Keep stirring until the mix is smooth and gooey. This part is key for a great texture. Remove the pan from heat. Now, mix in one teaspoon of vanilla extract and a pinch of salt. This adds depth to the flavor.
Combining and packing the mixture
Now, it’s time to combine everything. Take four cups of Rice Krispies cereal and fold them into the marshmallow mix. Make sure every piece gets coated well. Once the cereal is mixed in, add one cup of graham cracker crumbs and one cup of chocolate chips. Stir gently to distribute the crumbs and chips evenly. This adds a nice crunch and flavor.
Pour the mixture into your prepared pan. Using a spatula or greased hands, press it down firmly. This helps the treats stay together. For the final touch, sprinkle some extra chocolate chips and graham cracker crumbs on top. Press them down lightly for better adhesion. Let the mixture cool at room temperature for about 30 minutes. After it sets, cut it into squares or rectangles. Enjoy your delightful S’mores Rice Krispie Treats!
Tips & Tricks
How to keep treats from sticking
To keep your treats from sticking, start by greasing your pan well. Use cooking spray or butter. I like to coat the bottom and sides of the 9×13-inch dish. You can also grease your spatula or hands before pressing the mixture down. This helps a lot. If you find the mixture still sticks, try using parchment paper. Line the pan with it, then grease the paper. This makes removal easy and keeps the treats intact.
Perfecting the texture
To get the best texture, you want to melt the butter and marshmallows slowly. If you heat them too fast, they can become too hard. Stir them continuously until they blend into a smooth mixture. When you fold in the Rice Krispies, do it gently. You want to keep that light and crispy feel. Press the mixture firmly into the pan, but not too hard. This balance gives you that chewy yet crispy treat.
Storing leftover treats
Store any leftover treats in an airtight container. This keeps them fresh and chewy. I recommend placing a layer of parchment paper between the layers for easy access. They can last up to a week at room temperature. If you want to keep them longer, you can freeze them. Just wrap each piece in plastic wrap, then place them in a freezer bag. When you’re ready to enjoy, let them thaw at room temperature.
Pro Tips
- Use Fresh Ingredients: Ensure your marshmallows and chocolate chips are fresh for the best taste and texture.
- Press Firmly: When packing the mixture into the pan, press down firmly to help the treats hold their shape when cut.
- Try Different Chocolates: Experiment with different types of chocolate chips, like dark or white chocolate, for a unique flavor twist.
- Store Properly: Keep your S’mores Rice Krispie Treats in an airtight container to maintain freshness and prevent them from becoming hard.
Variations
Different flavor variations
You can tweak S’mores Rice Krispie Treats for more fun. Try using flavored marshmallows like chocolate or strawberry for a twist. You can also add peanut butter chips instead of chocolate chips for a nutty taste. For a fruity touch, mix in dried fruits like cranberries or cherries. Each option adds a new layer to your treats.
Dietary modifications (gluten-free, vegan)
Making these treats gluten-free is easy. Just swap regular graham crackers for gluten-free ones. For a vegan version, use dairy-free butter and vegan chocolate chips. Replace marshmallows with a vegan brand or homemade alternatives. This way, everyone can enjoy these treats without worry.
Seasonal twists (holiday versions)
You can make these treats festive for holidays. For Halloween, add candy corn or orange sprinkles. For Christmas, mix in red and green M&Ms. In the summer, add fresh berries for a refreshing taste. These seasonal changes keep your S’mores Rice Krispie Treats exciting all year round.
Storage Info
Best storage practices
To keep your S’mores Rice Krispie Treats fresh, store them in an airtight container. Line the container with parchment paper to prevent sticking. Place a layer of treats in the container and add another layer of parchment paper on top. This keeps them from getting hard or stale.
How long do S’mores Rice Krispie Treats last?
When stored properly, these treats last for about 1 week at room temperature. If you keep them in the fridge, they can last up to 2 weeks. Just remember to let them sit at room temperature for a few minutes before serving. This helps them soften back up for that perfect chewy bite.
Freezing tips
You can freeze S’mores Rice Krispie Treats for up to 3 months. Cut them into squares before freezing. Wrap each square tightly in plastic wrap and then place them in a freezer bag. When you want a treat, just take one out and let it thaw for about 30 minutes. Enjoy the gooey goodness anytime!
FAQs
Can I make S’mores Rice Krispie Treats in advance?
Yes, you can make these treats ahead of time. Just store them in an airtight container. They stay fresh for up to five days. If you want to serve them later, let them cool completely before packing them.
What can I use instead of Rice Krispies?
You can use other cereals like Cornflakes or Crisped Rice. Granola can work too, but it will change the texture. Choose a cereal that holds its shape and has a nice crunch.
How do I make these treats less sticky?
To reduce stickiness, use more butter or cooking spray on your hands. You can also try using less marshmallow. Another tip is to chill the mixture before pressing it into the pan. This helps them hold their shape.
In this guide, I shared the key ingredients and step-by-step instructions for S’mores Rice Krispie Treats. We explored tips to improve texture and storage methods. You learned about fun flavor variations and diet options. Remember, creativity counts! Experiment with toppings and adapt the recipe to fit your needs. With these simple steps, you can enjoy a classic treat anytime. Make them your own and share with friends for a tasty delight! Keep your treats fresh with proper storage, and enjoy them as a sweet snac